Ahsoka Crochet Doll
Ahsoka Crochet Doll


You can purchase an ad free PDF pattern in my Esty shop.

Be sure to check out my other free patterns in the Pattern Gallery
Hook
E 3.50mmYarn
- Red Heart Super Saver in Carrot- Red Heart Super Saver in Burgundy
- Red Heart Super Saver in Charcoal
- Red Heart Super Saver in White
- Red Heart Super Saver in Teal
- Red Heart Super Saver in Dusty Grey
- Red Heart Super Saver in Brown
Other Materials
- 9mm Safety Eyes- Polyfil
- Yarn needle
Stitches Used
MC - magic circle or magic ringSc - single crochet
Slpst - slip stitch
Sc2tog - single crochet 2 together or decrease
DC - double crochet
BLO - work in back loops only
Bobble - yarn over, draw up loop, yarn over, pull through 2, yarn over, draw up loop, yarn over, pull through 2, yarn over, draw up loop, yarn over, pull through 2, yarn over, pull through all 4 loops.
Project is worked in rounds starting from the feet and working up.
Arms
Make 21. With Carrot, Sc 6 in MC.
2. Sc 6
3. (Sc 2 in same stitch) 2 times and Sc 1 in each of the remaining 4 stitches.
4. Sc 8
5. (Sc2tog) 2 times and Sc 1 in each of the remaining 4 stitches.
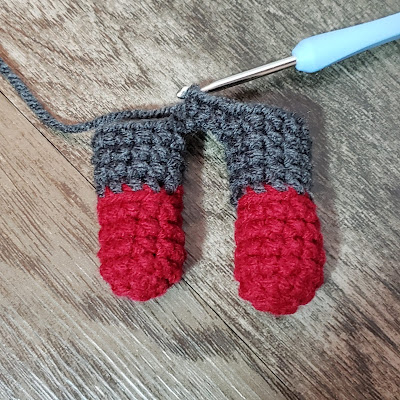
6. - 11. (6 rows) With Burgundy, Sc 6
12. - 17. (6 rows) With Carrot, Sc 6
Leg #1
1. With Burgundy, Sc 6 in MC.2. (Sc 2 in same stitch) 6 times [12]
3. - 6. (4 Rows) Sc 12
7. With Charcoal, in BLO Sc 12
8. - 10. (3 Rows) Sc 12
Slpst in next stitch and finish off.
Leg #2
1. With Burgundy, Sc 6 in MC.2. (Sc 2 in same stitch) 6 times [12]
3. - 6. (4 Rows) Sc 12
7. With Charcoal, in BLO Sc 12
8. - 10. (3 Rows) Sc 12
Do not finish off, continue with body.
Body
Continue with Charcoal from Leg #2,1. ch 3, Sc 1 in each stitch around Leg #1, Sc 3 along chain, Sc 1 in each stitch around Leg #2, Sc 3 along chain. [30]
2. (Sc 4, Sc 2 in same stitch) 6 times [36]
3. Sc 36
4. With Burgundy, in BLO Sc 36
5. - 7. (3 Rows) Sc 36
STOP and stuff legs
8. (Sc 4, Sc2tog) 6 times [30]
9. - 11. (3 Rows) Sc 30
12. (Sc 3, Sc2tog) 6 times [24]
13. -14. (2 Rows) Sc 24
15. (Sc 2, Sc2tog) 6 times [18]
16. - 17. (2 Rows) Sc 18
STOP, stuff body
18. With Carrot, in BLO Sc 18
19. (Sc 1, Sc2tog) 6 times [12]
21. Sc 12
Do not finish off, continue with head.
Head
1. Continue with Carrot from body, (Sc 2 in same stitch) 12 times. [24]2. (Sc 3, Sc 2 in same stitch) 6 times [30]
3. (Sc 4, Sc 2 in same stitch) 6 times [36]
4. (Sc 5, Sc 2 in same stitch) 6 times [42]
5. Sc 42
6. Sc 26, Bobble, Sc 15
(This is approximate, place Bobble in center of body)
7. - 13. (7 rows) Sc 42
14. (Sc 5, Sc2tog) 6 times [36]
15. (Sc 4, Sc2tog) 6 times [30]
16. (Sc 3, Sc2tog) 6 times [24]
17. (Sc 2, Sc2tog) 6 times [18]
STOP. Stuff head and place eyes.
18. (Sc 1, Sc2tog) 6 times [12]
19. (Sc2tog) 6 times [6]
Stitch closed.
2. (Sc 1, Sc 2 in same stitch) 3 times [9]
3. Sc 9
4. (Sc 2, Sc 2 in same stitch) 3 times [12]
5. In BLO with White, Sc 12
6. (Sc 3, Sc 2 in same stitch) 3 times [15]
7. (Sc 4, Sc 2 in same stitch) 3 times [18]
8. (Sc 5, Sc 2 in same stitch) 3 times [21]
9. (Sc 6, Sc 2 in same stitch) 3 times [24]
10. (Sc 7, Sc 2 in same stitch) 3 times [27]
11. (Sc 8, Sc 2 in same stitch) 3 times [30]
Finish off
2. (Sc 1, Sc 2 in same stitch) 3 times [9]
3. Sc 9
4. (Sc 2, Sc 2 in same stitch) 3 times [12]
5. In BLO with White, Sc 12
6. (Sc 3, Sc 2 in same stitch) 3 times [15]
7. (Sc 4, Sc 2 in same stitch) 3 times [18]
8. (Sc 5, Sc 2 in same stitch) 3 times [21]
9. (Sc 6, Sc 2 in same stitch) 3 times [24]
10. (Sc 7, Sc 2 in same stitch) 3 times [27]
11. (Sc 8, Sc 2 in same stitch) 3 times [30]
Do not finish off, continue with rest of hair.
18. (Sc 1, Sc2tog) 6 times [12]
19. (Sc2tog) 6 times [6]
Stitch closed.
Hair
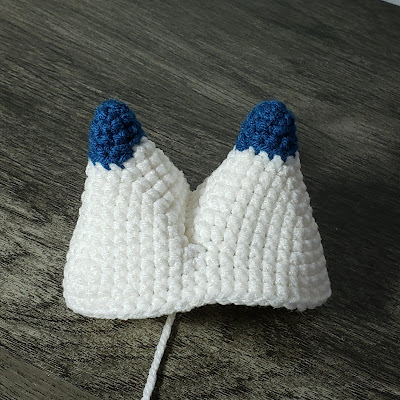
It is best to make all hair pieces and sew them together, then sew the hair to the doll.Bump # 1
1. With Teal, Sc 6 in MC2. (Sc 1, Sc 2 in same stitch) 3 times [9]
3. Sc 9
4. (Sc 2, Sc 2 in same stitch) 3 times [12]
5. In BLO with White, Sc 12
6. (Sc 3, Sc 2 in same stitch) 3 times [15]
7. (Sc 4, Sc 2 in same stitch) 3 times [18]
8. (Sc 5, Sc 2 in same stitch) 3 times [21]
9. (Sc 6, Sc 2 in same stitch) 3 times [24]
10. (Sc 7, Sc 2 in same stitch) 3 times [27]
11. (Sc 8, Sc 2 in same stitch) 3 times [30]
Finish off
Bump #2
1. With Teal, Sc 6 in MC2. (Sc 1, Sc 2 in same stitch) 3 times [9]
3. Sc 9
4. (Sc 2, Sc 2 in same stitch) 3 times [12]
5. In BLO with White, Sc 12
6. (Sc 3, Sc 2 in same stitch) 3 times [15]
7. (Sc 4, Sc 2 in same stitch) 3 times [18]
8. (Sc 5, Sc 2 in same stitch) 3 times [21]
9. (Sc 6, Sc 2 in same stitch) 3 times [24]
10. (Sc 7, Sc 2 in same stitch) 3 times [27]
11. (Sc 8, Sc 2 in same stitch) 3 times [30]
Do not finish off, continue with rest of hair.
12. Slpst 9 to join Bump #1 and Bump #2, (Sc 6, Sc 2 in same stitch) 3 times around Bump #1, then (Sc5, Sc 2 in same stitch) 3 times around Bump #2 [48]
13. - 15. (3 Rows) Sc 48
Leave tail to sew to head.
Hair Sides
Make 21. With Teal, Sc 6 in MC
2. Sc 3, Sc 3 in same stitch, Sc 2 [8]
3. Sc 4, Sc 3 in same stitch, Sc 3 [10]
4. In BLO with White, SC 10 [10]
5. Sc 5, Sc 3 in same stitch, Sc 4 [12]
6. Sc 12
7. Sc 6, Sc 3 in same stitch, Sc 5 [14]
8. In BLO with Teal, Sc 14
9. Sc 7, Sc 3 in same stitch, Sc 6 [16]
10. Sc 16
11. Sc 8, Sc 3 in same stitch, Sc 7 [18]
12. In BLO with White, SC 18
13. Sc 9, Sc 3 in same stitch, Sc 8 [20]
14. SC 20
15. Sc 10, Sc 3 in same stitch, Sc 9 [22]
16. In BLO with Teal, Sc 22
17. Sc 11, Sc 3 in same stitch, Sc 10 [24]
18. Sc 24
19. Sc 12, Sc 3 in same stitch, Sc 11 [26]
Stuff and sew to hair.
Hair Back
1. With Teal, Sc 6 in MC2. Sc 3, Sc 3 in same stitch, Sc 2 [8]
3. Sc 8
4. Sc 4, Sc 3 in same stitch, Sc 3 [10]
5. In BLO with White, SC 10 [10]
6. Sc 5, Sc 3 in same stitch, Sc 4 [12]
7. Sc 12
8. Sc 6, Sc 3 in same stitch, Sc 5 [14]
9. Sc 14
10. In BLO with Teal, Sc 7, Sc 3 in same stitch, Sc 6 [16]
11. Sc 16
12. Sc 8, Sc 3 in same stitch, Sc 7 [18]
13. SC 18
14. Sc 9, Sc 3 in same stitch, Sc 8 [20]
15. In BLO with White, SC 20
16. Sc 10, Sc 3 in same stitch, Sc 9 [22]
17. Sc 22
18. Sc 11, Sc 3 in same stitch, Sc 10 [24]
19. Sc 24
20. In BLO with Teal, Sc 12, Sc 3 in same stitch, Sc 11 [26]
21. Sc 26
22. Sc 13, Sc 3 in same stitch, Sc 12 [28]
23. Sc 28
24. Sc 14, Sc 3 in same stitch, Sc 13 [30]
Stuff and sew to hair.
Hair Jewels
1. With Dusty Grey, join to front of hair. (Sc 2, Bobble stitch in space 2 rows up) x 5, and Sc 2.Finish off and weave in tail.
Belt
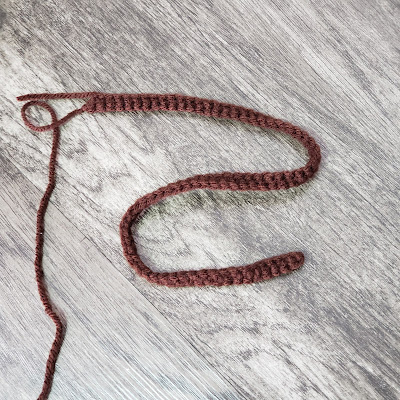
1. With Coffee, Ch 73.2. Starting in 2nd Ch from hook, Sc 72.
Finish off and leave tail. Wrap around body twice and sew.
Belt Buckle
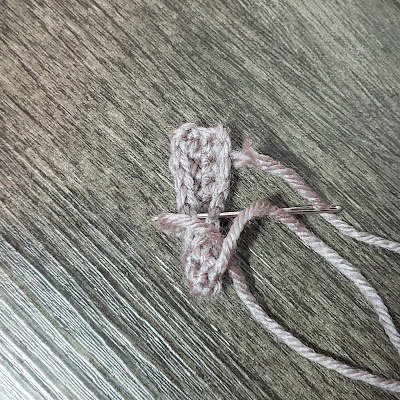
1. With Dusty Grey, Ch 5.2. Start in 2nd ch from hook, Sc 4, ch 1 and turn.
3. Sc 4.
Finish off and leave tail to sew to belt.
Front Flap
1. With Burgundy, Ch. 62. Start in 2nd Ch from hook, Sc 3, Dc 2, Dc 3 in same stitch,
Continue by crocheting up the back side of the chain,
Dc 3 in same stitch, Dc 2, Sc 3. [16]
Finish off and leave tail to sew to belt buckle.
Light Sabers
Small
1. With Dusty Grey, Ch.72. Sc 6, ch 1, turn.
3. Sc 6, ch 1, turn.
4. Sc 6.
Sew last row to the chain row to create a tube and sew to belt.
Large
1. With Dusty Grey, Ch.92. Sc 8, ch 1, turn.
3. Sc 8, ch 1, turn.
4. Sc 8.
Sew last row to the chain row to create a tube and sew to belt.








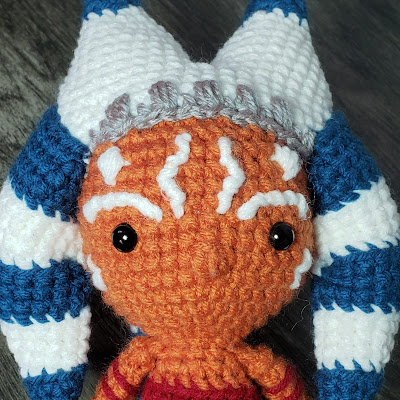


I can’t figure out how you attached all the hair. It says attach all the pieces but not very specific on how and their isn’t any pictures. Made everything and I’m lost at how to finish that last of of 😭
ReplyDeleteTry taking the hair and don’t sew the ends, put them on either side of the main hair piece and just sew through. like a sandwich. hair side, main, hair side
DeleteCan anyone show or go into better detail on how to attach the three head-tails to the hat part? I’ve tried over and over and I can’t get the sides to swoop down and look like the picture. How much stuffing should go in them also? It’s looking more like sonic the hedgehog for me. 😂 Any help or detailed photos/explanation would be so helpful! Thanks!
ReplyDelete